Weekly Maintenance
Having a weekly nopCommerce maintenance can prevent huge problems in the future. This will help your nopCommerce store running smoothly throughout the days. nopCommerce made it easy for you to do your maintenance without a hassle.
nopCommerce: Deleting Old Files
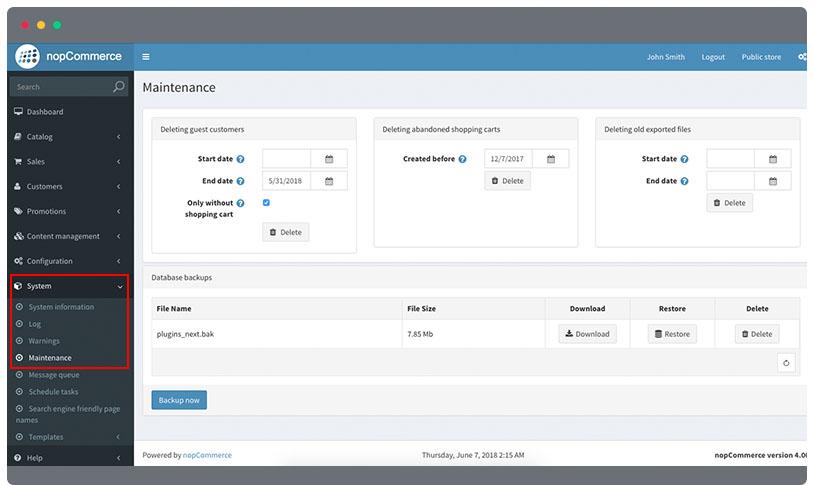
Go to System > Maintenance. There are 4 title sections in this settings:
- Deleting guest customers
- Deleting abandoned shopping carts
- Deleting old exported files
- Database backups
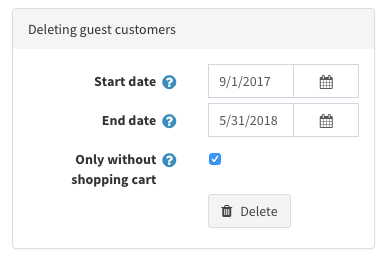
nopCommerce: Deleting guest customers
- Set start date by entering a date in the input area (the following format Month/Day/Year / 5/30/2018 ) or you can click the calendar icon and choose the starting date.
- Set the end date. Enter a date in the input area (the following format Month/Day/Year / 5/30/2018 ) or you can click the calendar icon and choose the starting date.
- Mark the Only without shopping cart checkbox if you need to delete guests customers that does not have a shopping cart lists or wishlists. If unchecked, all guest customers will be deleted on that range of date you set.
- Click the Delete button.
- A notification will show how many items were deleted.
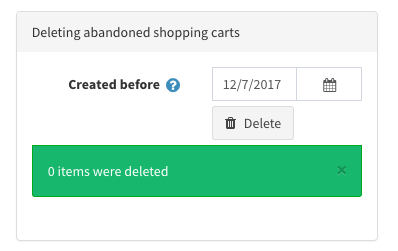
nopCommerce: Deleting abandoned shopping carts
- Set the date of which the shopping carts are created before the date that you will set. Enter a date in the input area (the following format Month/Day/Year / 5/30/2018 ) or you can click the calendar icon and choose the date.
- Click the Delete button.
- A notification will show how many items were deleted.
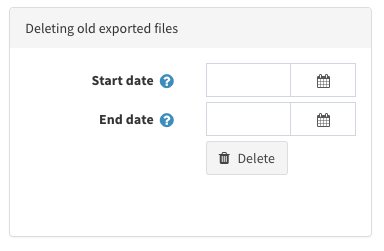
nopCommerce: Deleting old exported files
- Set start date by entering a date in the input area (the following format Month/Day/Year / 5/30/2018 ) or you can click the calendar icon and choose the starting date.
- Set the end date. Enter a date in the input area (the following format Month/Day/Year / 5/30/2018 ) or you can click the calendar icon and choose the starting date.
- Click the Delete button.
- A notification will show how many items were deleted.
nopCommerce: Database backups
- Click the Backup now button
- Wait for the processing to finish. After that, it will show on the lists of backup database of your nopCommerce store

nopCommerce: Logs
These are series of error reports of the nopCommerce system. The reports includes errors created by the customers, the date and the details about the error.
To view nopCommerce system log errors, go to System > Log
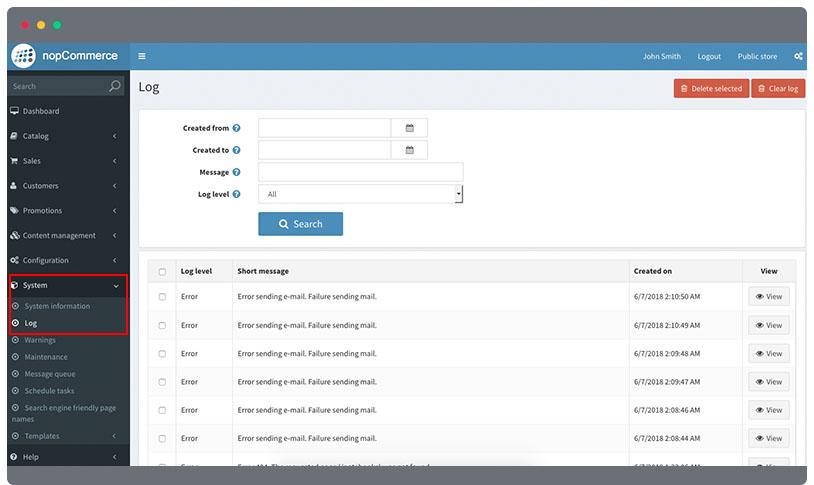
- Enter starting date in the input or click the calendar icon to choose date.
- Enter end date in the input or click the calendar icon to choose date.
- Enter text for the message or part of the message to search
- Select log level to search. There are six types of log level to choose from:
- All
- Debug
- Information
- Warning
- Error
- Fatal
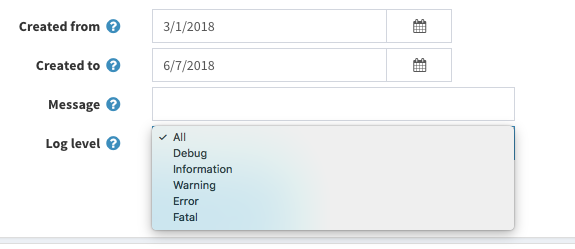
- Click the Search button to begin searching.
- Select a log and click View button in the right corner
- You can see a detailed log errors that includes the following:
- Log level
- Short message
- Full message
- IP address
- Customer
- Page URL
- Referrer URL
- Created on
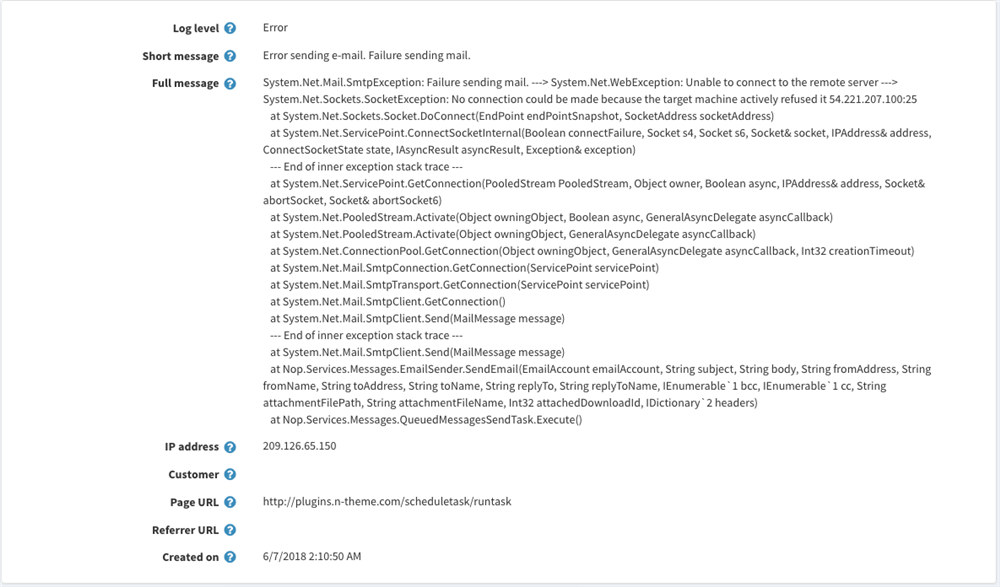
- If you want to delete the log, click the Delete button in the top right corner.
nopCommerce: Activity Log
This is used to track user activity in the system. All activity types are enabled for tracking by default in nopCommerce. This can be disable by unchecking the type of activity you don’t want to track.
To view nopCommerce activity logs, go to Customers > Activity Log > Activity Log
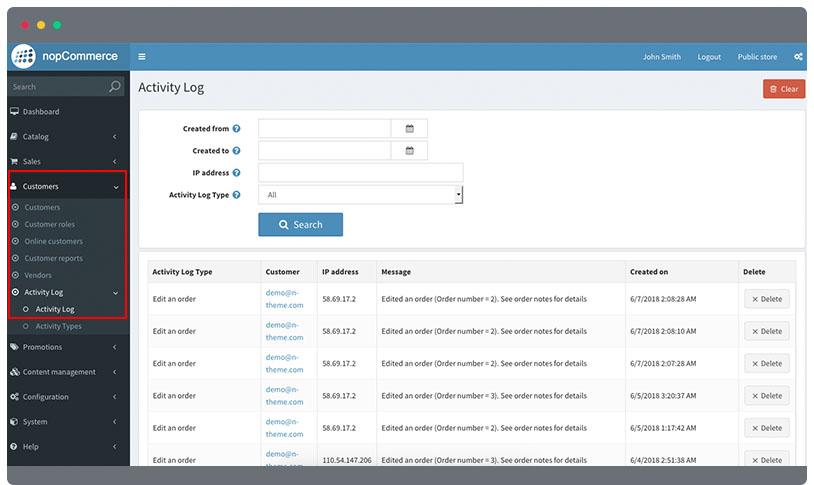
- Enter starting date in the input or click the calendar icon to choose date.
- Enter end date in the input or click the calendar icon to choose date.
- Enter the IP address you want to search.
- Select activity log type to search.
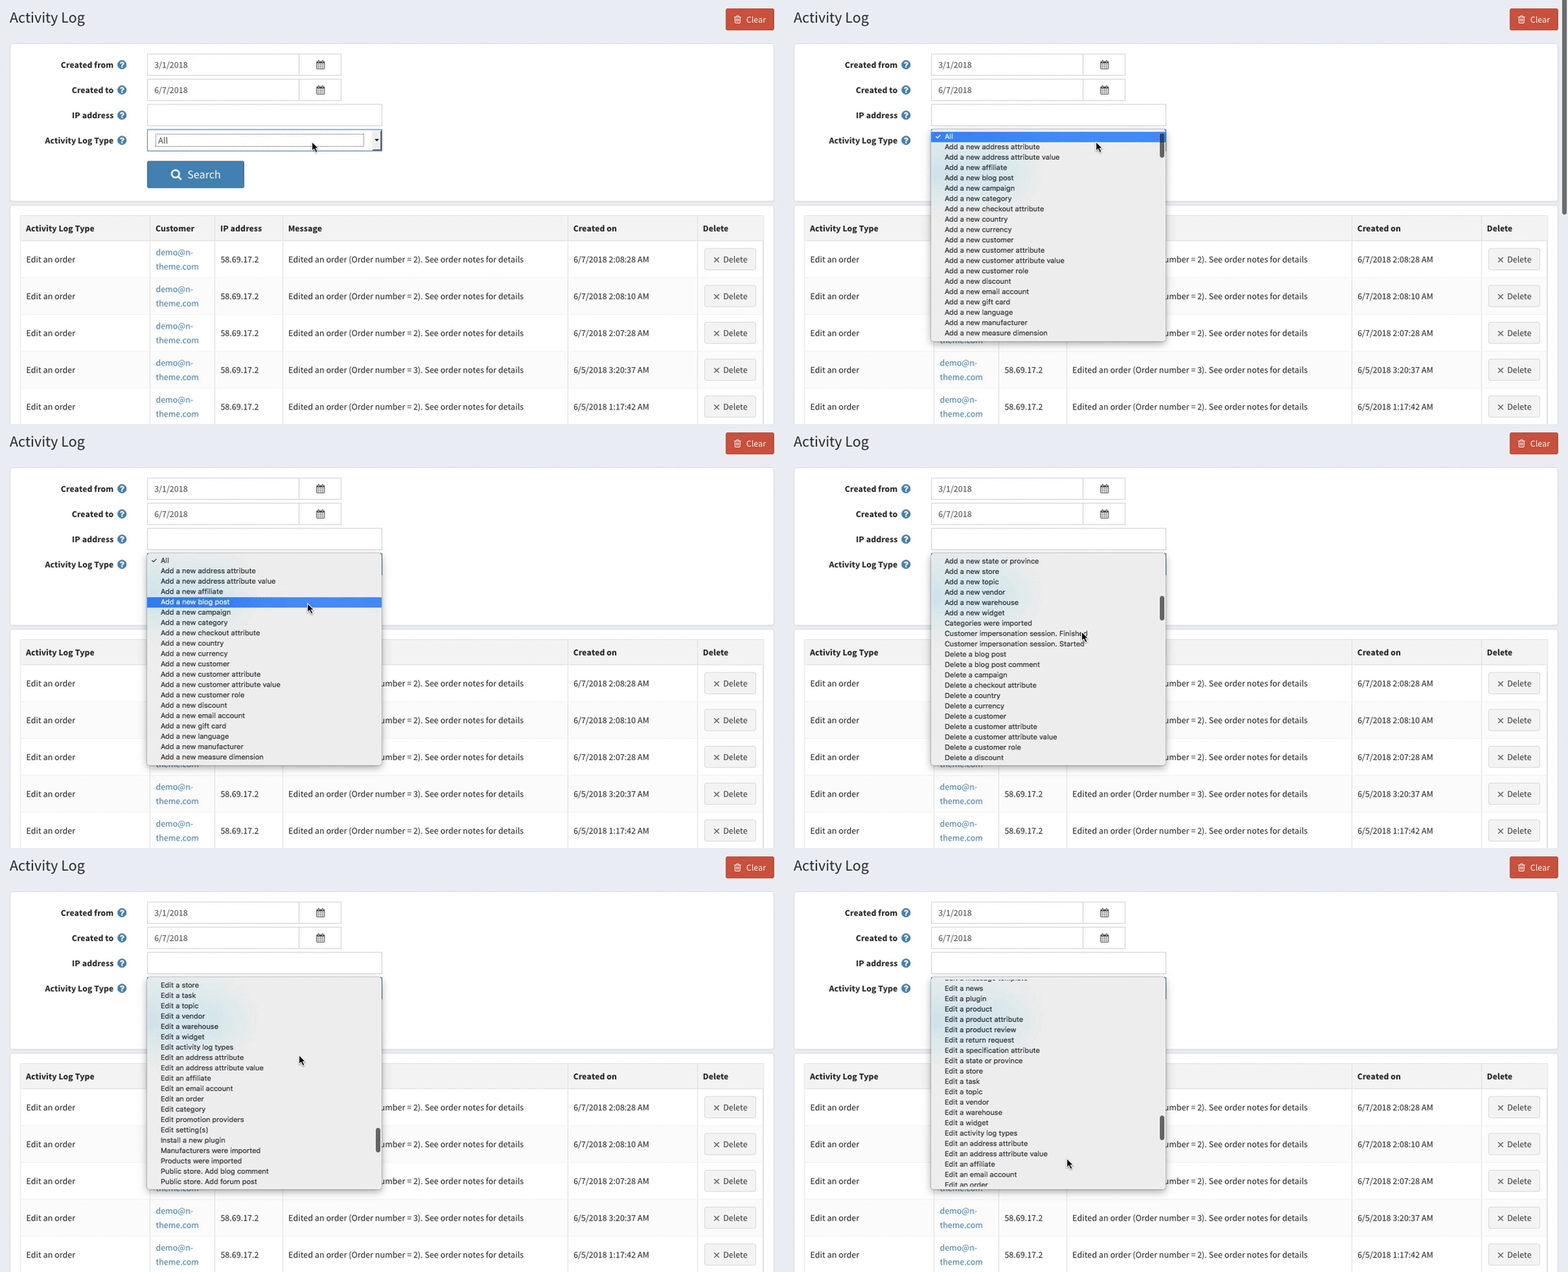
- Click the Search button to begin searching.
- Select an activity log and click View button in the right corner.
- You can see all lists of activity logs you’ve set in the search. If you want to delete the log, click the Delete button in the right corner.
nopCommerce: Activity Types
You can uncheck nopCommerce activity types to track by going to Customers > Activity Log > Activity Types
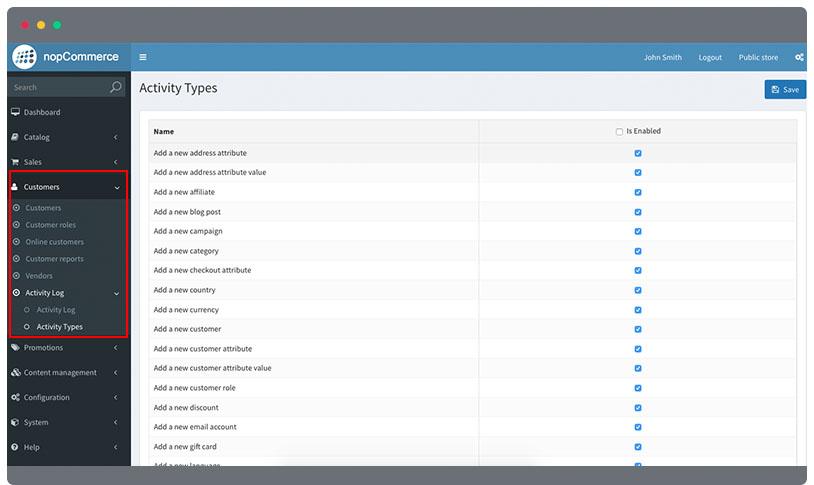
- By default, all activity types are checked. If you wish to uncheck it, find an activity type you don’t want to track.
- Click on the checkbox to unmark.
- Click Save button in the top right corner.

