NopCommerce Import/Export
Exporting Excel Files
The best way to know how your database is structured is by exporting files. In this, you know how the datas are stored. The files can be open in a spreadsheet. Once you are accustomed, you can used these to store bulk datas for your products, categories and other section that requires export/import function.
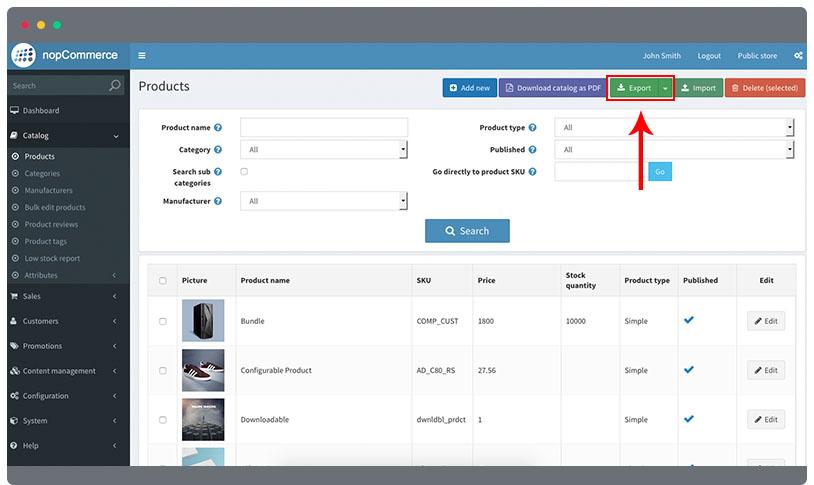
To export from products:
- Go to Catalog > Products
- In the top right corner, click the arrow in the Export button. You can see the following:
- Export in XML (all found)
- Export in XML (selected)
- Export in Excel (all found)
- Export in Excel (selected)
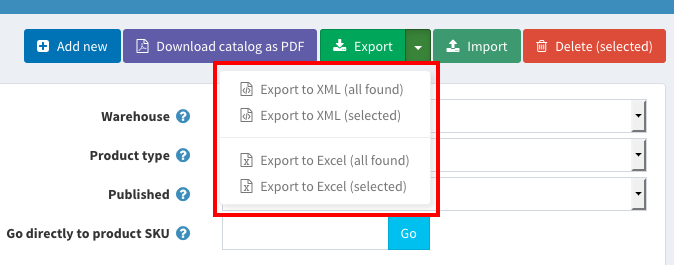
- Choose between:
- Export to Excel (all found) if you want all the products to export.
- Export to Excel (selected) if you only want selected products to export. Select first in the checkbox the products you want to export.
- Save the file.
To export from categories:
- Go to Catalog > Categories
- In the top right corner, click the arrow in the Export button. You can see the following:
- Export in XML
- Export in Excel
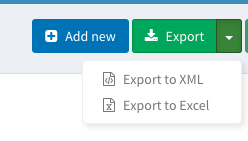
- Choose Export to Excel.
- Save the file.
To export from orders:
- Go to Sales > Orders
- In the top right corner, click the arrow in the Export button. You can see the following:
- Export in XML (all found)
- Export in XML (selected)
- Export in Excel (all found)
- Export in Excel (selected)
- Choose between:
- Export to Excel (all found) if you want all the orders to export.
- Export to Excel (selected) if you only want selected orders to export. Select first in the checkbox the orders you want to export.
- Save the file.
To export from newsletter subscribers:
- Go to Promotions > Newsletter subscribers
- In the top right corner, click the Export to CSV.
- Save the file.

Importing Excel Files
Data importing gives you the capability to update or replace datas in your products without the need to open them one by one in the product lists. Also if you need to add bulk products, importing data is very helpful and can save your time. This is like entering values just like in the admin but it's in the spreadsheet format.
Always remember you must strictly follow the headers in the excel file. For your convenience, you can export excel files and set it as your structure sample. Don’t delete the headers in the excel file as this will serve as your sample.
Orders and customers doesn’t have any options to import.
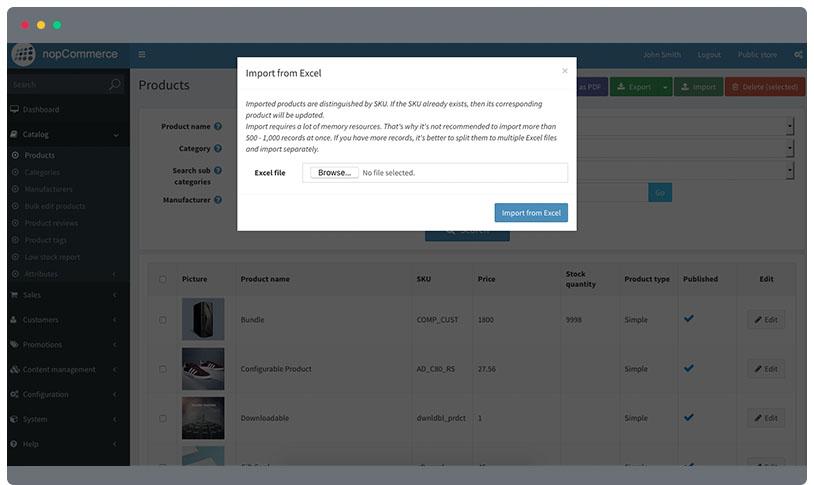
Importing excel files in product
Prepare your data.
- Enter all the necessary values for your import file. Please take note that you should follow the headers in the exported file to avoid any errors.

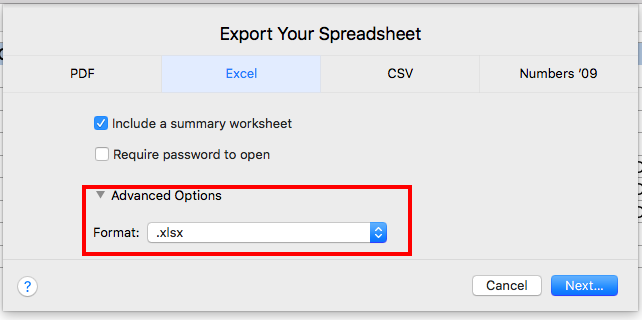
- After you are finish adding all the product lists in your spreadsheet, save the file as .xlxs file. Note: Maximum record in a single file is 1000. More than the required record can affect the system performance.
Uploading your data
- Go to Catalog > Products.
- Click Import button in the top right corner.
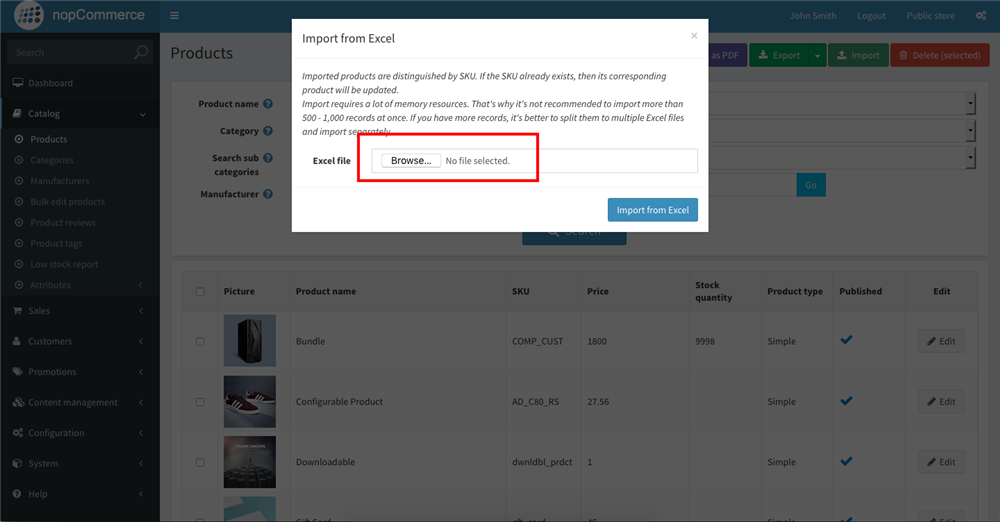
- Click the Browse button.

- Find the excel file you want to import.
- Click Import from excel button.
Check your imported product.
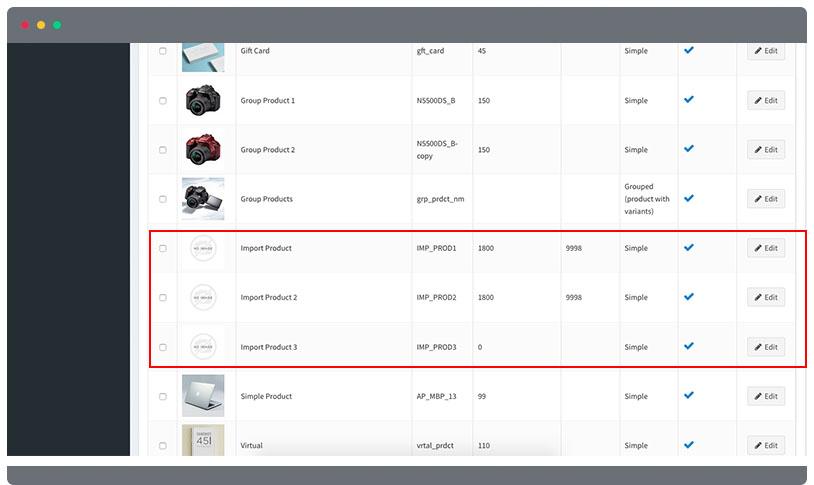
- You should see the newly added products in the products lists.
- Click one of the imported products by clicking the Edit button in the right corner.
- Check all the necessary values if correct.
Importing excel files in categories
Prepare your data.
- Enter all the necessary values for your import file. Please take note that you should follow the headers in the exported file to avoid any errors.
- After you are done putting all the category lists in your spreadsheet, save the file as .xlxs file. Note: Maximum record in a single file is 1000. More than the required record can affect the system performance.
Uploading your data
- Go to Catalog > Categories.
- Click Import button in the top right corner.

- Click the Browse button.
- Find the excel file you want to import.
- Click Import from excel button.
Check your imported category.
- You should see the newly added category in the lists.
- Click one of the imported category by clicking the Edit button in the right corner.
- Check all the necessary values if correct.
Importing excel files in newsletter subscribers
Prepare your data.
- Enter all the necessary values for your import file. Please take note that you should follow the proper format in the exported file to avoid any errors.
- After you are done putting all the category lists in your spreadsheet, save the file as .csv file.
Uploading your data
- Go to Promotions > Newsletter subscriber.
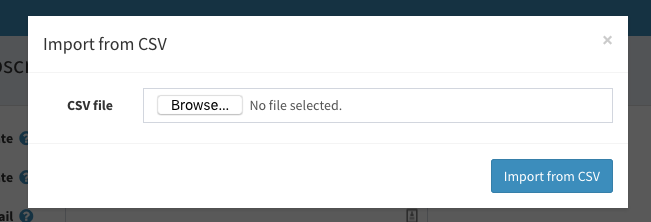
- Click Import from csv button in the top right corner.


- Find the csv file you want to import.
- Click Import from csv button.
Check your imported subscribers.
- You should see the newly added subscribers in the lists.
- If you want to edit the email, click Edit button.
Import settings
You have the option to allow import/export settings in certain options in the system. To do this go to Configuration > Settings > All settings (advanced)
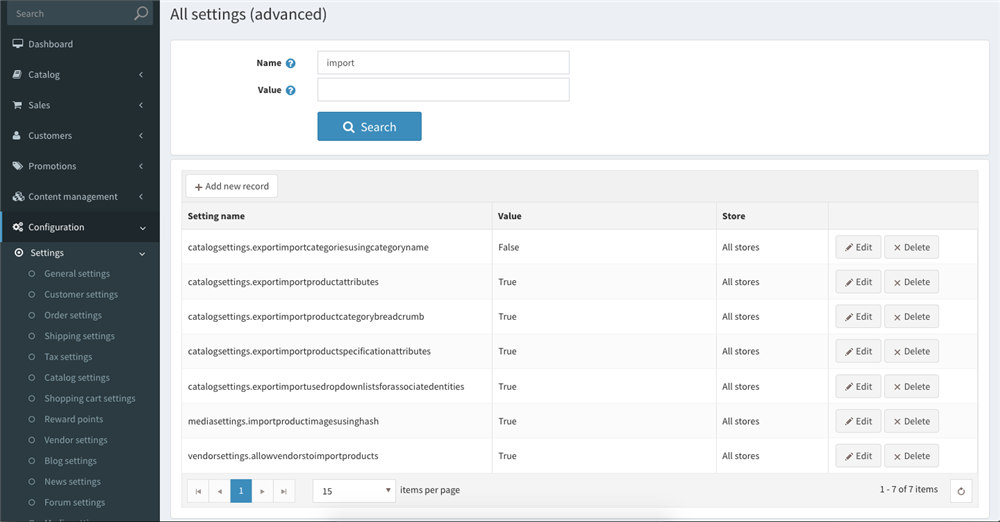
- Enter Import in the Name value.
- Click the search button.
- You should see all the settings that have an import name on it.
- If you want to edit and not allow it when import or exporting, click the Edit button.

- Change the Value to its opposite. True means you will allow and False means you do not allow.
- Select which store it will be.
- Click the Update button.

